About course registration in Workday
There are two primary ways you can register for courses in Workday:
- Create a saved schedule and register all your courses at once.
- Register for individual courses one at a time.
Before registering in courses
If you choose to register all your courses using a saved schedule, make sure to edit your saved schedule and resolve alerts and conflicts before registration opens. This can help to prevent issues during your registration process.
- Go to your saved schedules. If you’re not sure how to find it, follow this tutorial.
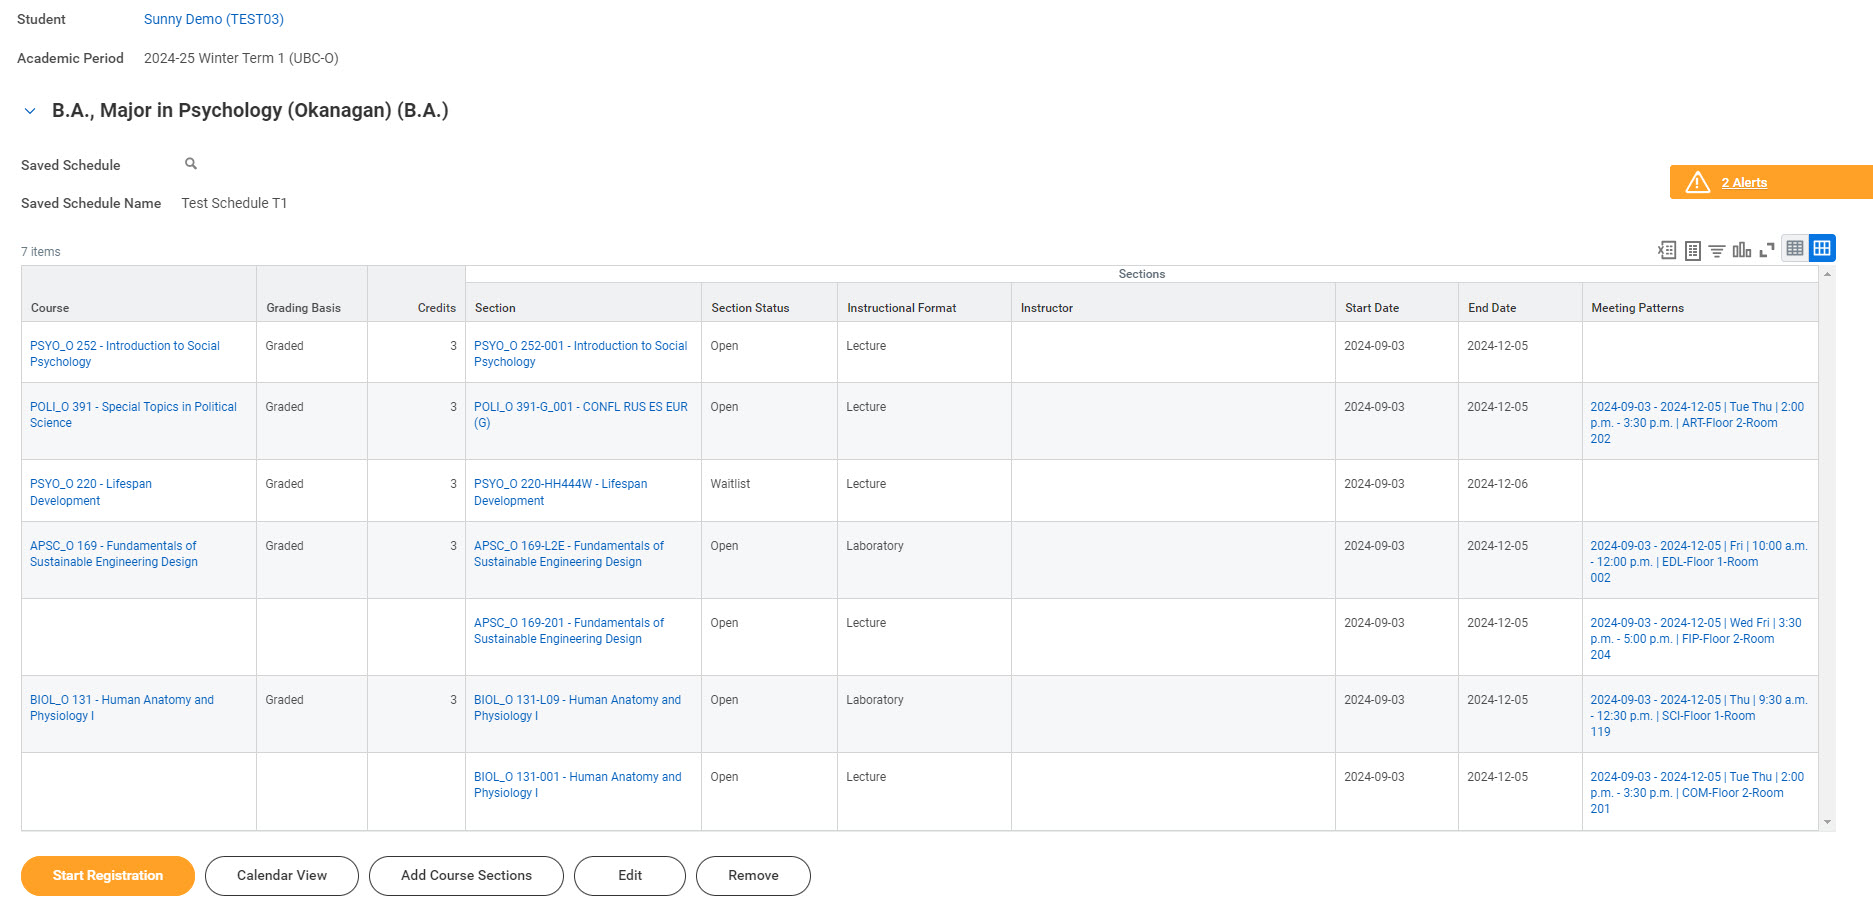
- On the “View My Saved Schedules” page, you’ll find a summary of the course sections you have added under each saved schedule in table format.
- Review the saved schedule to make sure you have selected the correct course section(s).
- Check that you’ve resolved all the alerts, if applicable. For help on managing saved schedule alerts, follow this tutorial.

How to register from a saved schedule
First, review your saved schedule
Follow the steps above to find, review, and confirm the saved schedule you want to register.
Note that you will need to register your courses from both your Term 1 and Term 2 saved schedules separately.
Next, register your saved schedule
- Under your saved schedule table summary, click the orange “Start Registration” button on the left. The button will only appear when registration opens for you.

- You’ll be brought to a new page with the heading, “Start Registration from Saved Schedule”. Here, you can make any last-minute changes or resolve course conflicts before registering. If you have unresolved course conflicts, you will not be registered in the conflicting courses.
- Once you are ready, click the orange “Register” button at the lower left corner of the page. Your registration will be processed in Workday.

Review your registrations
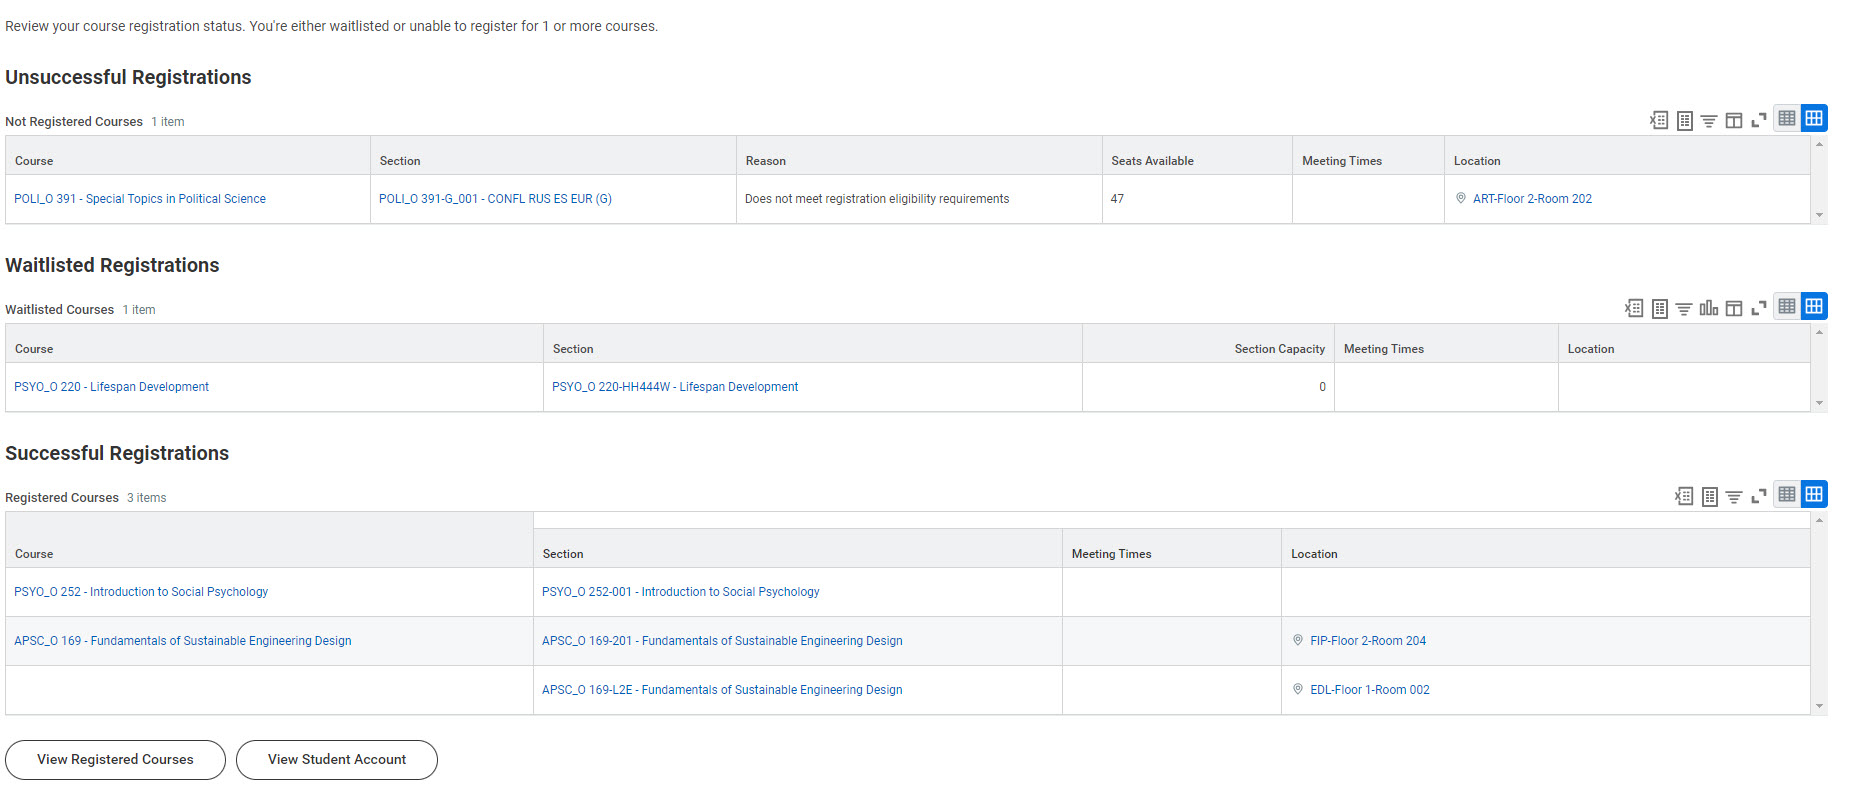
After you complete your registration, a registration summary will appear on the screen in a table format. The summary is divided into 3 sections:
- Unsuccessful
- Waitlisted
- Successful registrations
Unsuccessful registrations
You were not registered in these courses. Review the “Reason” column to find out why your registration was unsuccessful.
Waitlisted registrations
You were added to the waitlist of these courses. You may be offered a spot in the course if a seat becomes available. Make sure the email address in your profile is correct to ensure you receive these messages as you will have 24 hours to claim the seat if one becomes available.
Successful registrations
You were successfully registered in these course sections. Click the white “View Registered Courses” button at the lower left corner under the table summary for a complete list of your registered courses.

Additional resources
- Registering for individual course sections
- Swapping courses
- Dropping a course
- Withdrawing from a course
Other Course registration tutorials
- Adding a course waitlist to your saved schedule
- Adding yourself to the waitlist for an individual course section
- Checking a course waitlist status and capacity
- Creating a saved schedule
- Dropping a course
- Editing your saved schedule
- Finding course conflicts in a saved schedule
- Registering for individual course sections
- Registering in a course from the waitlist
- Registering in courses from a saved schedule
- Resolving a hold on your academic record
- Reviewing saved schedule alerts
- Swapping a course
- Troubleshooting registration
- Troubleshooting your saved schedule
- Viewing the course schedule
- Viewing your registration appointment
- Viewing your saved schedule
- Viewing your waitlisted courses
- Withdrawing from a course